(this article is part narrative, part notes for myself, so it'll be rambling and updated as I think of things to say)
The electronics were down in the basement. The first thing I noticed was a Hazeltine 1510 terminal, but it was priced at $450 so both Steve and I passed on it. As far as we know, it may have gone to a landfill, as this was the last day of the sale.
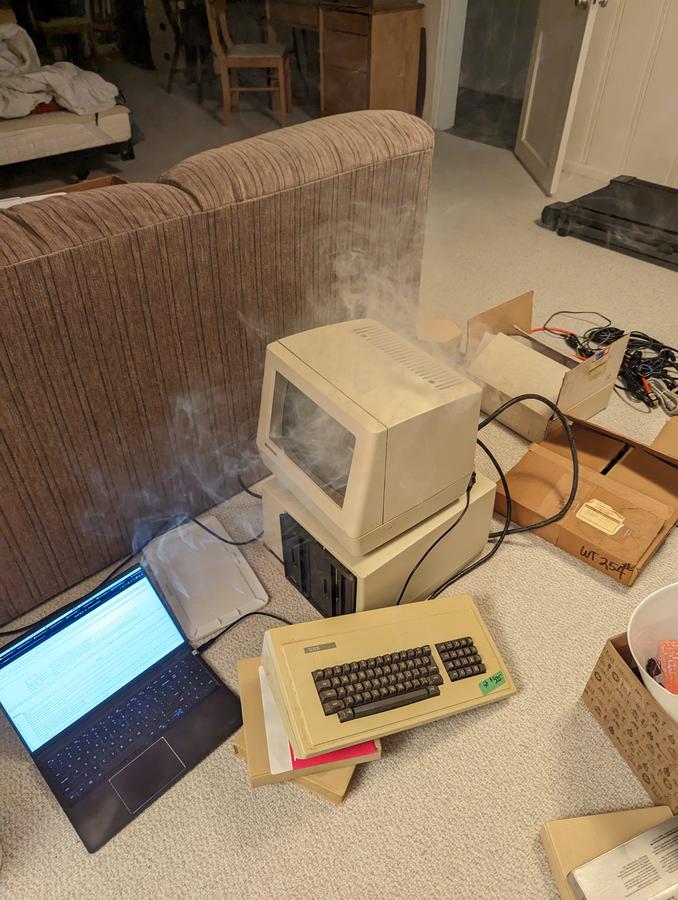
Next, I saw a dusty old keyboard with the Xerox brand and a DB-25 connector, marked "$200/set", the rest of the set being a CRT it plugged into the back of. I lugged them over to a table, turned it on, and greeted with the choice of "A" to boot or "T" for typewriter.
Somewhere around this time, Steve had arrived and explained it was a Xerox 820 machine with Z-80 CPU. The day before, he'd bought an enclosure with two 8" floppy drives inside that went with it. Oh, but there's another enclosure right over there. ($75, I think?) And the floppies are on the other side of that wall.
After sorting through the floppies one that seemed to be a CP/M boot floppy turned up, so we lugged the rather heavy floppy box over, hooked the lot up, and pressed "A" to boot. And ... it booted!
I had been all set to say "no" to this purchase but I have also been wanting to have a Z80-based system. I'd imagined it would be an RC2014 or similar, but this was the real deal. So I gathered up 4 boxes of 8" floppies, 3 spare 820 motherboards(!), carried it all up with Steve's help, paid about $200 for everything, and headed home.
The next opportunity I got to play with it, I got to have the experience of a capacitor going up in smoke!
Capacitor go POP
First surprise: there seems to be no complete schematic for this power supply on-line, so I'll have to identify the capacitor from its remains:
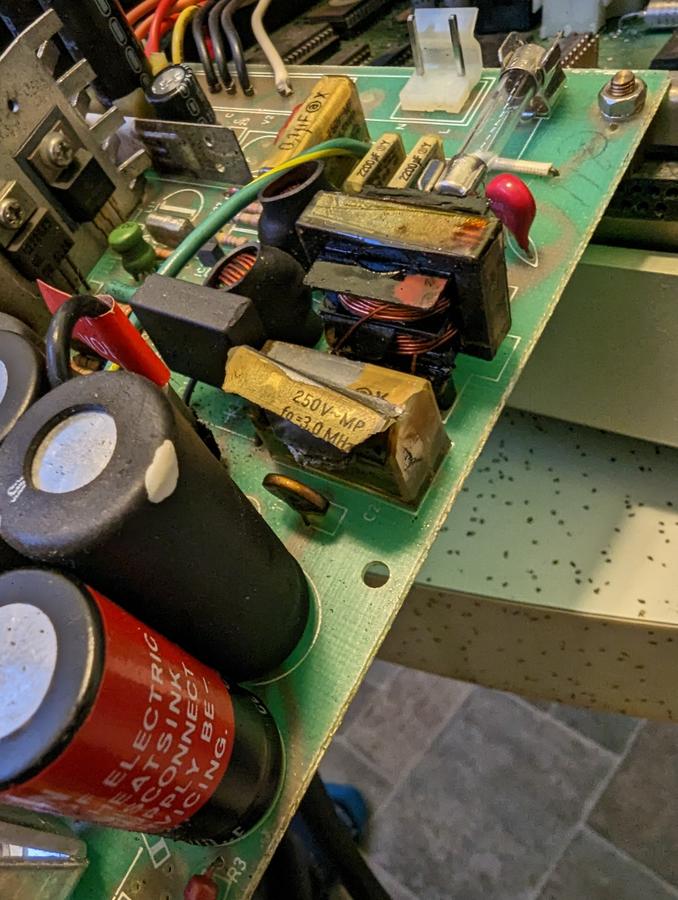
That'll be tough
Luckily, I found someone whose capacitor didn't explode in quite the same way so the top label was legible and ordered a full set of new caps.
Here are the X and Y type caps on the board. I replaced them all, as well as the 4 large electrolytics:
- C1: 0.1uF type X
- C2: 0.22uF type X
- C3, C4: 2200pF type Y
With that fixed, the computer is happy again and I can get back to playing with CP/M!
Fixing the B: drive
The B drive wouldn't read at all. Eventually, all that was needed was to adjust the sensitivity of the index photodetector all the way to one extreme, giving a pulse width of about 1.6ms. The photodetector, the corresponding LED, or both, have clearly not improved with age or use.With both drives working, I was able to INIT a fresh floppy, SYSGEN it so that it could boot CP/M, and finally copy all my working boot floppy's files to it with PIP B:=A:*.*. Now that I could boot CP/M from a disk of my own making, the original CP/M booting disk went to the back of a box, not to be touched except in case of damage to my new boot floppy. (using COPY to make a sector-level copy might have been better but this worked)
Getting data into the computer
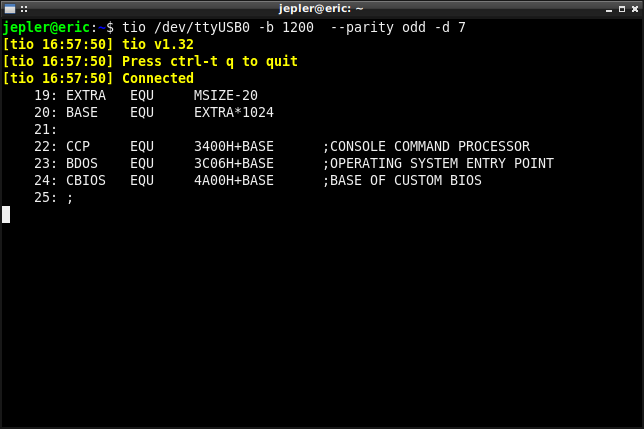
I grabbed a USB to RS232 adapter from Adafruit for just this purpose. In fact, when the blue smoke came out I was in the process of verifying that the "printer" port worked by using the typewriter mode to type on the Xerox and seeing the characters show up in the terminal program on my laptop.Once the computer was fixed I discovered that I could also copy data *OUT* using PIP.COM, though there was the oddity that I had to send a carriage-return back to the Xerox for it to proceed with printing the next line!
PIP PRN:=CBIOS.MAC
I actually created a small Python program that will send the necessary bytes back to the Xerox so that a whole listing or hex file can be retrieved: lister.py.
But how could I transfer data the other way, for instance into a .HEX file on a CP/M disk? well.....
with PIP.COM of course!
Unfortunately, from reading Xerox's "CBIOS" it appears that the printer port is only coded for output, not input (makes sense?) and the second RS232 port, labeled COMM .. isn't coded at all? Luckily, PIP.COM is coded so that the user can supply the I/O routine themselves with a minimum of fuss. Here are the details:
- When a character is to be READ from the device INP: the routine at location 0103h is called
- This routine must store the returned character at 0109h
- (It's not needed for our purposes, but 0106h is called for the special OUT: device)
- The bytes from 010Ah to 01FFh are reserved for implementing INP: and OUT:
- The ROM monitor provides a routine to read from the printer, waiting until a byte is available and then returning it in the A register. This routine is at F015h
Here's how to customize PIP.COM:
- Load it in the debugger: DDT PIP.COM
- Assemble a jump to the INP: routine at 0106h:
A106
JMP 10A
# blank line to terminate assembling
- Assemble the actual code at 010Ah:
A10A
CALL F015
STA 0109
RET
# blank line to terminate assembling
- Exit the debugger with Ctrl+C
- Save the patched program as PIPX.COM: SAVE 30 PIPX.COM
- Try the new PIPX: PIPX.COM TTY:=INP: and send data from your computer at 1200 baud, 7-bit, 1 stop bit, odd parity.
The next problem is flow control. When PIPX's internal buffer fills, it takes several seconds to write the data out to the floppy. So PIPX.COM FOO.HEX=INP: will actually work for small files, but not for larger files. There seems to be no provision for 'standard' flow control, sooo....
PIP (and, by extension, my patched PIPX) has a special 'buffered' mode. In buffered mode, receiving a CTRL+S character makes PIP complete any ongoing write operation. However, there's no way to signal completion to INP: meaning that the sender just has to ensure it waits "long enough" for the write to complete.
And for reasons which were no doubt obvious at the time, the sender sends a CTRL+Z byte to terminate the transfer.
I wrote a small program, pusher.py, to automate the process. It took about 3 minutes to transfer a 30kB HEX file, which decoded into a 13kB COM program, and seems to work properly!
In theory, I can write a few registers to change the serial parameters. Most of the time (250 out of 300 seconds) was taken by actual serial writing, so if 19200 baud would work reliably it could really cut things down. (in fact, 4800 baud is the fastest for `TTY:=INP:` that worked reliably; 7200 seemed to work for `FOO.TXT=INP:`. A more extensive patch of PIP is required to set the baud rate at each invocation, because the warm start sequence of CBIOS sets the "B" port's baud rate again. Hopefully I can move on to xmodem or another sophisticated transfer program and achieve faster speeds and better hanshaking.)
Typical transfer commandline is therefore: PIPX.COM FOO.HEX=INP:[BEH]
TODO: Code OUT: into PIPX so that it doesn't do the handshake-waiting that PRN: does. Or, just switch to a proper file transfer program on an 8N1-configured port.
Goodies on the floppies
There are two floppies with MBASIC.COM and a bunch of games in BAS format. Note: turn on capslock when using MBASIC, because "load" doesn't work, only "LOAD".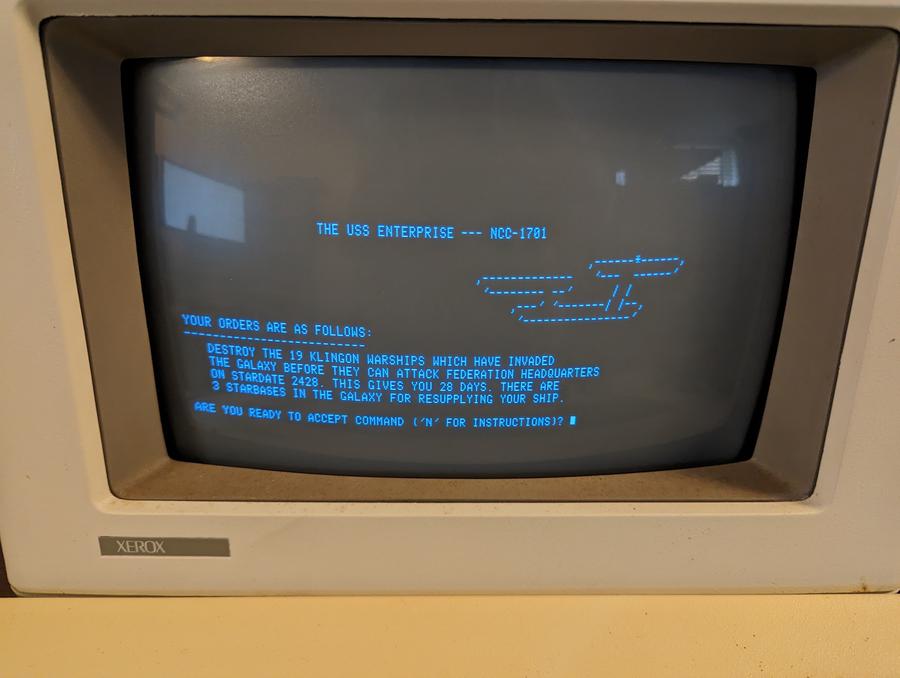
Yes, one of the games is STARTREK.BAS!
There are what appear to be logs of HAM radio activity from the 80s.
git repository; xmodem
I've collected a bunch of manuals and I'm starting to collect software.where else to put it but github.
I finished an xmodem port which can run at 19200 baud! Only tested in the "to xerox" direction so far.
I wonder what's next. now I can easily transfer files over and try other software. It'd also be nice to be able to do full-disk images from the 820 to computer, I guess using xmodem in sending mode.
higher baud rates & disk imaging
By setting SIO register 4's "clock mode" bits to 00, you get 16x higher baud rates, 800 to 307200 baud. I have successfull transferred data out of the Xerox at 307200 baud.I created a Xerox-specific disk imaging program. Right now it uses ihex and takes about 3 minutes per disc. It has to patch the BIOS to not prompt after disk errors. I've successfully archived several floppies this way.
headless operation
The firmware in the 810 only allows the console to be on the keyboard & CRT. However, there were a bunch of spare motherboards. Leaving aside the lack of drives (my friend Steve does have a second drive box with 1 working and one almost working drive in it though!) this presents a difficulty making use of the other boards.I had planned to patch the firmware, which is organized as two 2kB halves. Well, that's a lie. I'd extracted a promise from my friend Chris that in exchange for a board he'd port his own monitor to it. But then when archiving floppies I found that I had someone's reverse-engineered PROM source!
I fixed it up so it could be built by the zmac compiler (not hard!) and in thinking about it realized that it was very nearly trivial to test it without programming any (E)EPROMs!
When the board boots, the ROM is at 0; it uses a small bootstrap program to copy the data starting at 010h up to 0f000h, and then jumps to the cold start entry at 0f00h.
This just needs a 1-byte patch to become a valid CP/M ".com" program, altering the source address to 0110h!
The additions to the running PROM code are modest, and fit entirely in the low half: * Initialize SIO A to 19200 8N1 * Change CONST (checking for console character entry) to first check SIO A for a pending byte; if one is found, it is place on the ring buffer. (it would be cool to do this from an interrupt instead!) * Because of the use of the ring buffer, CONIN actually needs no change! * Change CRTOUT to first put the character in the SIO A transmit buffer, then do all its regular activities
Due to having the full PROM source, I didn't have to take any special measures to keep my patch from moving routines entry points around. All external entries are via jump tables at the start of each PROM, and all internal jumps are freshly assembled to the right addresses.
For testing, I then copy the resulting COM file over with xmodem, and run it. This brings the computer into the monitor, but when all is working properly it responds identically on the serial port an on keyboard/CRT.
One wrinkle is that all the Xerox software is written for ADM-3A style terminal codes, while modern Linux terminals all talk VTxx / ANSI. So the "flying starship" animation at the start of STARTREK.BAS isn't right. Alas. Will I write an ADM-3A emulator? time will tell.
Anyway, coming along at various rates are some (apparently rare now) 2816 EEPROMs and an EEPROM burner. At which point the spare 820 boards will be separately useful.
Power connector
The 9p power connector's mating part is TE Connectivity AMP connector 794741-1, available at digikey. Depending on wire gage the crimp pins are A100565CT-ND (14-20AWG) and A97890CT-ND (18-24AWG). I only used the 18-24AWG ones.
I made a couple of new power harnesses using an "ATX extension cable" as a donor of a connector that would mate with a standard ATX power supply. Just connect -12V, +12V (at position 2), +5V (at position 9), and grounds (at positions 3, 4, and 5). This powers the basic logic; the CRT needs an additional 12V support at position 7, while the disk drive needs an additional +12V rail at pin 3 and a +5V rail at pin 8.
You'll also need to connect the ATX "power on" signal to GND for your power supply to generate an output.
Entry first conceived on 11 May 2023, 12:27 UTC, last modified on 26 June 2023, 18:20 UTC
Website Copyright © 2004-2024 Jeff Epler